As spring came and went we were a bit behind if we wanted to frame the house by the end of summer. There were endless tasks that had piled up over our first winter in the trailer, but we were finally getting around to the foundation, which went through several evolutions before taking its final-form underfoot. If you haven’t read Part 1 of this saga, check it our here.
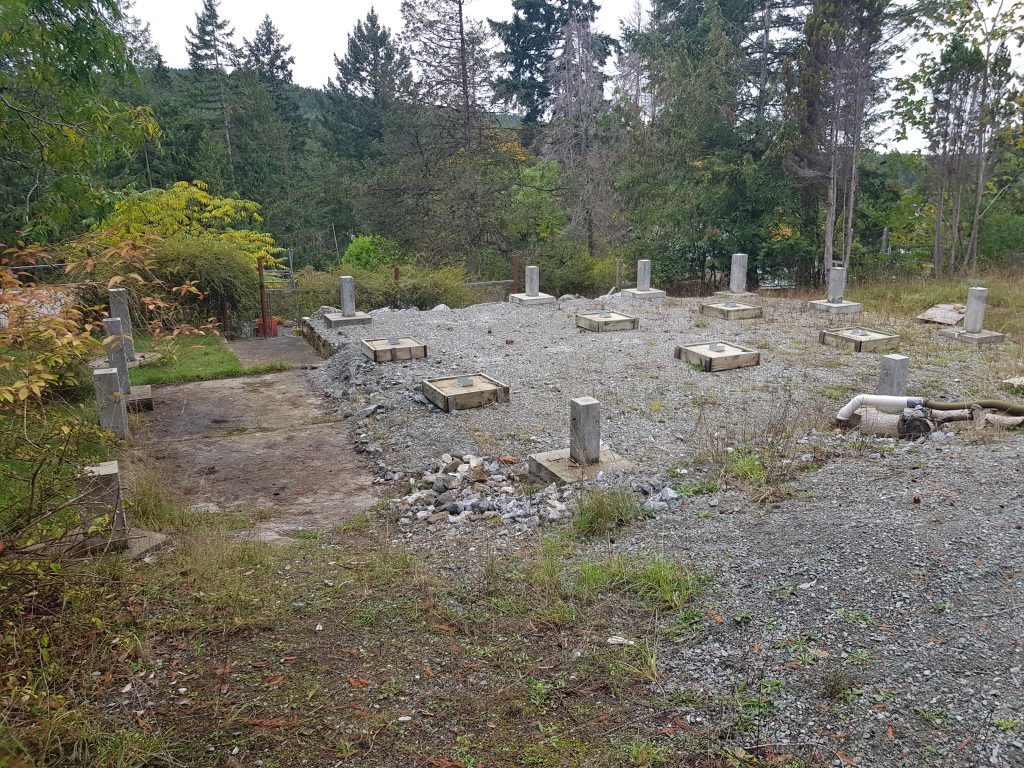
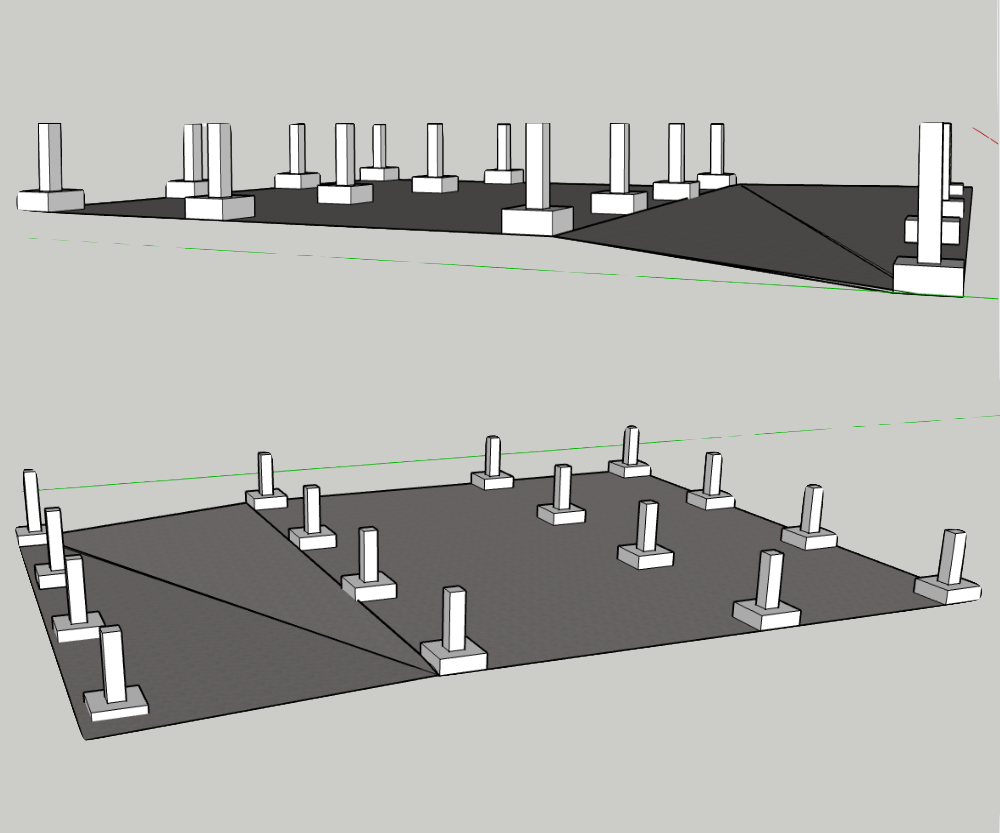
When building a house, you can build to suit the site or you can change the site to suit your design. Hardscaping and the heavy machinery involved are expensive. Since ours is a small budget venture, we wanted to use what was available on the land to the extent it was possible. One of the previous owners of the property had begun construction on a house. When we viewed the property we hoped we would be able to use the existing foundation. There was a grid of 16 piers and footings making up a rectangle of approximately 30’ by 40’. The alignment in all dimensions were…let’s say, questionable but workable. The first sets of building plans we workshopped all involved using the piers in a beam on pier foundation carrying a subfloor made from our trees.
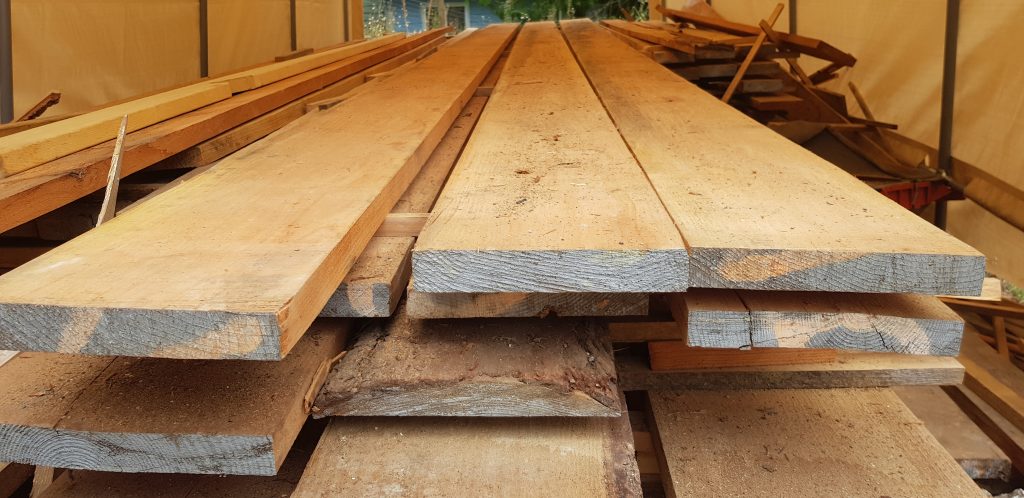
The first issue this raised was how much of the lumber would be consumed just making up the beams for the subfloor. While the pile of logs, once felled, looked like a lot of wood, we had no idea how much usable lumber they would produce. We made a lumber list and sorted the items by their market price, prioritized getting the most expensive cuts from our trees. To maintain flexibility in design moving forward, I had all the largest logs cut to 2×12 so we could make up beams or repurpose them elsewhere.
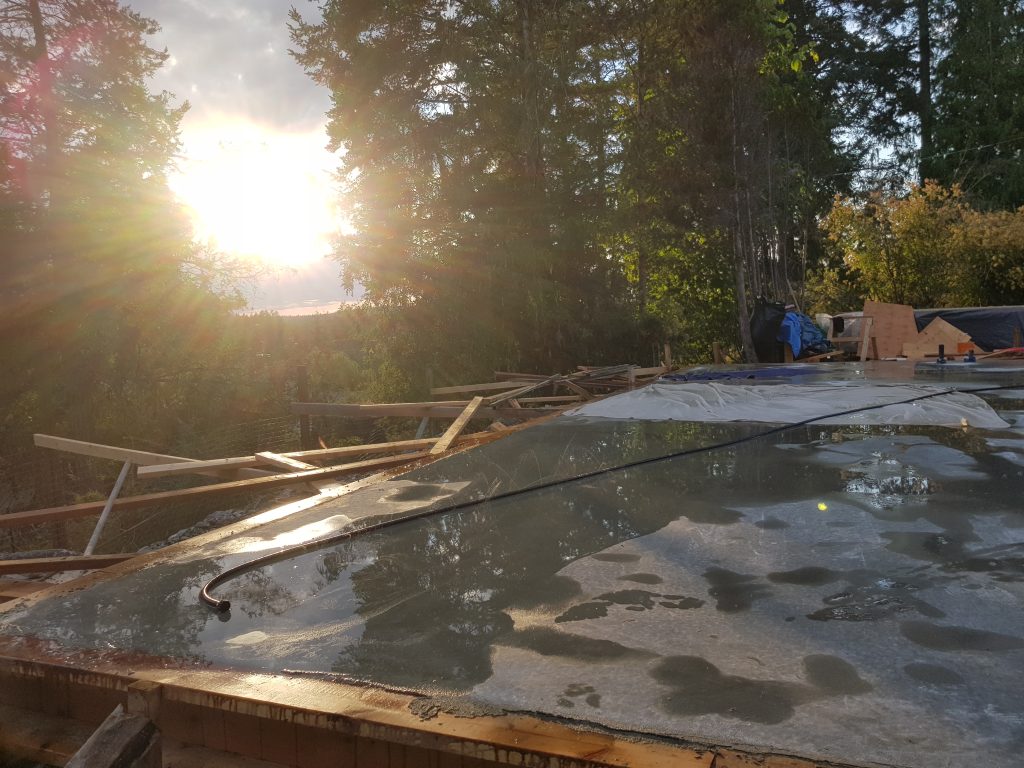
The second issue was sealing the underside of the house. This floor design would require insulated floor and something like hardie-board over the entire underside of the floor to protect against mice and rats, who like your insulation as much as you do. Add to that, cladding, to essentially create a sealed vented crawlspace. The cladding would be further complicated by the fact that the building site is not level. You can see in the first image how the last row of piers sit on a sloped depression, built on an old concrete path.
I also grew more concerned with the reinforcement (or potential lack thereof) in the piers. Before moving forward, I thought I better “inspect” one. At the time I could not speak to the quality of the reinforcement. The concrete itself was very structurally sound. The sledge hammer had virtually no impact.
On my next trip to town I rented a 30lb jackhammer. It took me the better part of 2 hours to reduce one pier to rubble and a few haphazardly placed pieces of rebar. I had been taught to build columns firmly attached to a grid in the footing. These had several L’s haphazardly sticking up into the pier and a few scattered bars in the footing. Did I already mention they were not really aligned? No bueno. That was the last straw for the beam-on-pier foundation. I was going to need a bigger jackhammer.
I returned the following weekend with a 60lb jackhammer. Some smaller tool rental shops closed weekends, and a Friday afternoon to Monday morning rental is often a single day rate. I removed every pier that was on the level plane of the foundation site and their footings. Even with the big Hilti, it took nearly 2 days of intermittent jackhammering to remove them.
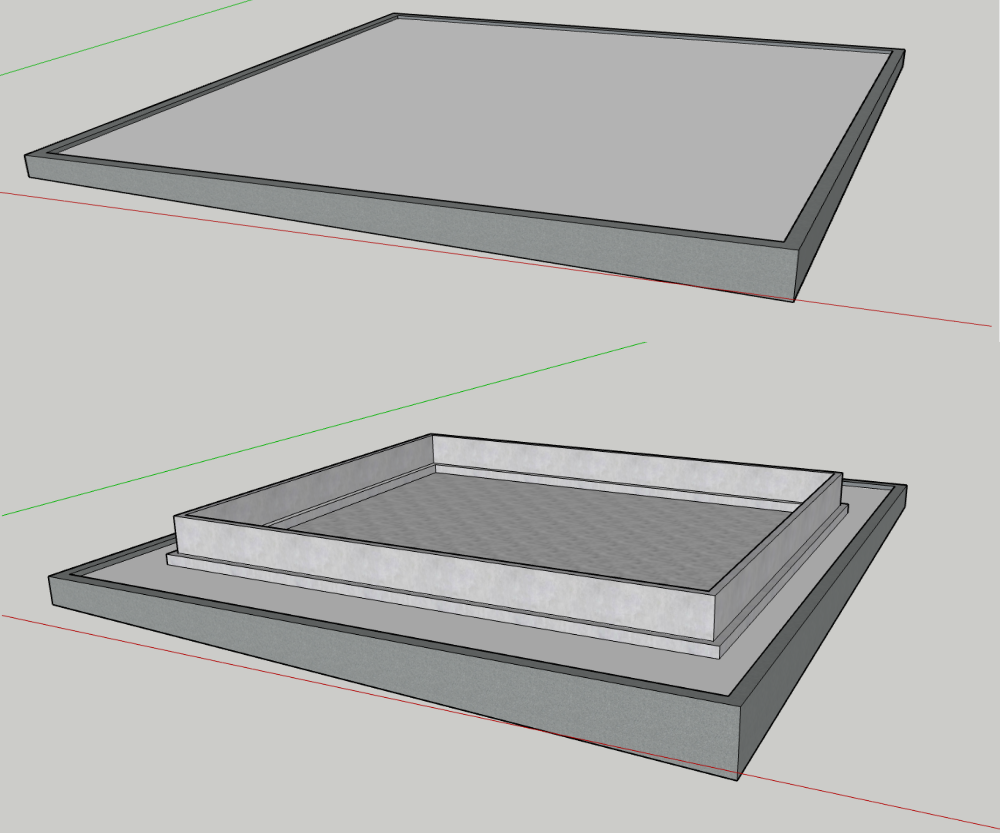
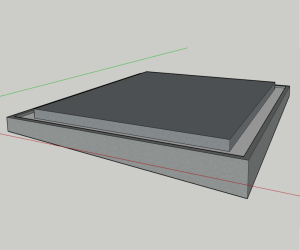
With our plans unburdened, we moved on to a second idea: a crawlspace. This would solve our vermin issue and we also needed to get the house up about 3 feet to match the elevation on the driveway side of the house. I was initially attracted to the idea of using ICFs (insulated concrete forms). They are basically like giant Lego blocks that act as both the form and the finished insulated surface of the foundation. They are not prohibitively expensive, but the main thing they save is time. This can be quite cost effective if you are hiring someone to do it but one does not save money building one’s own house by hiring someone else to do it.
I remained undecided but carried forward on the assumption we would build a 3 foot crawlspace foundation, either ICF or conventional formwork, like the bottom right image below.
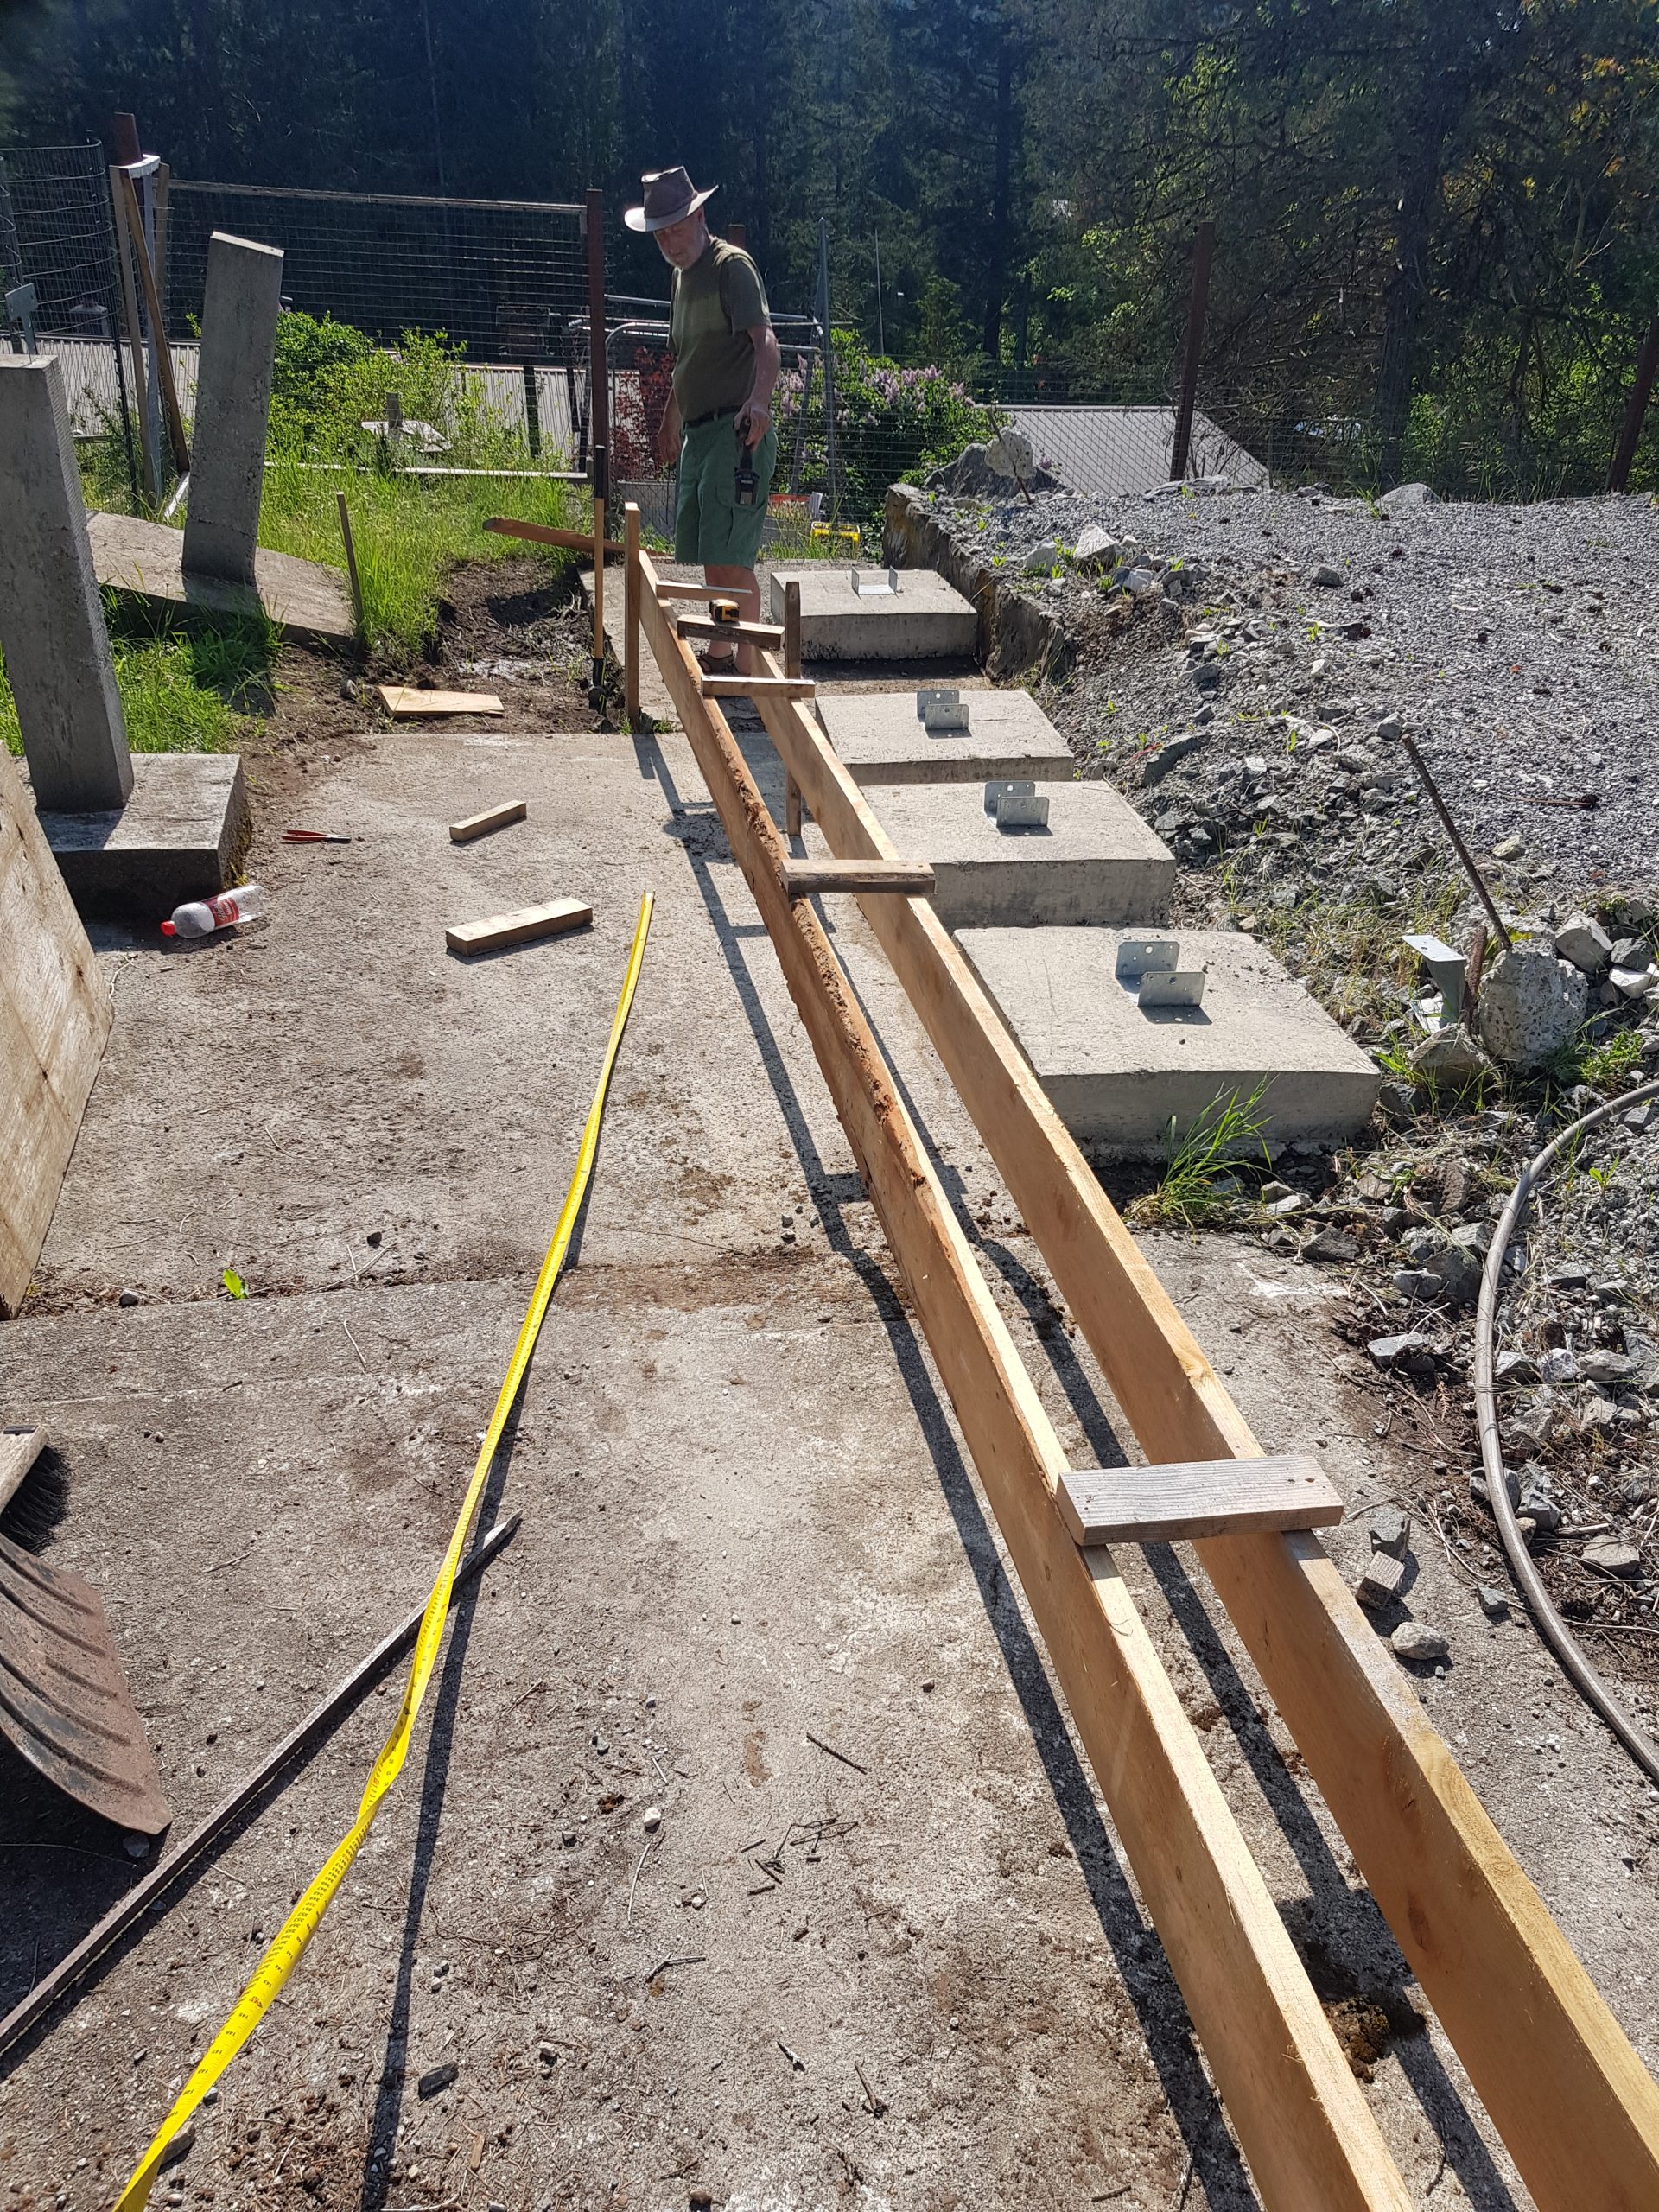
I was still bothered by only having a foot wide area that was level. That had not been an issue with the piers. We discussed taking up the extra height in the foundation, creating a deeper corner in the crawlspace but it added a lot of headaches later on. I decided I would put in a retaining wall in the low corner and make a larger flat and level platform on which to build. These little ideas, they spring up like weeds and then sort of get away on you.
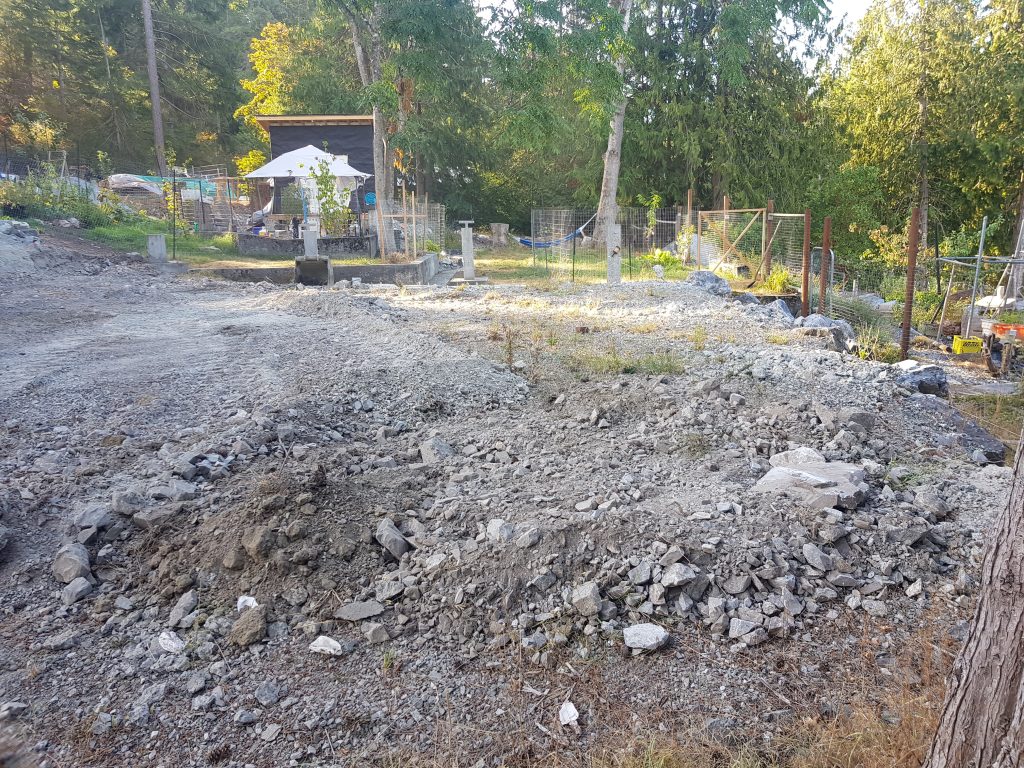
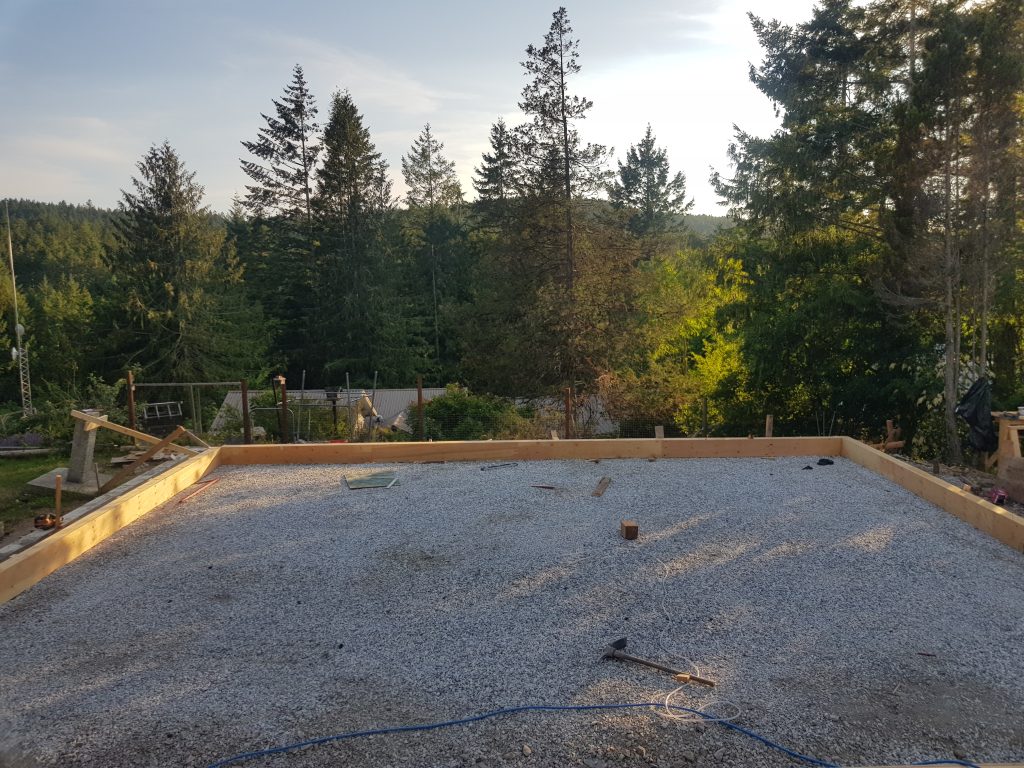
I didn’t take many pictures of the process. It was a rushed affair in the peak of summer heat and I was also replacing someone’s roof at that inopportune time. It amounted to a little over one cubic meter in the end, mixed from Navvy Jack and cement in a portable electric drum mixer. I then backfilled against the retaining wall, this time with a little help from a 1.8 ton John Deere mini-excavator that I traded my labor to use. I buried the remnant footings of the old foundation and started anew; tabula rasa.
Once I had a flat building site we thought further about the crawlspace and the subfloor structure that would follow. By this time we had taken some time to restack and sticker some of the lumber and get a better count of what we had. We were also more certain about the design of the house we were building, but I wasn’t convinced about the crawlspace. By rough estimate I would lose most of the 2x8s and half of the 2x12s in beams to the subfloor of the first story.
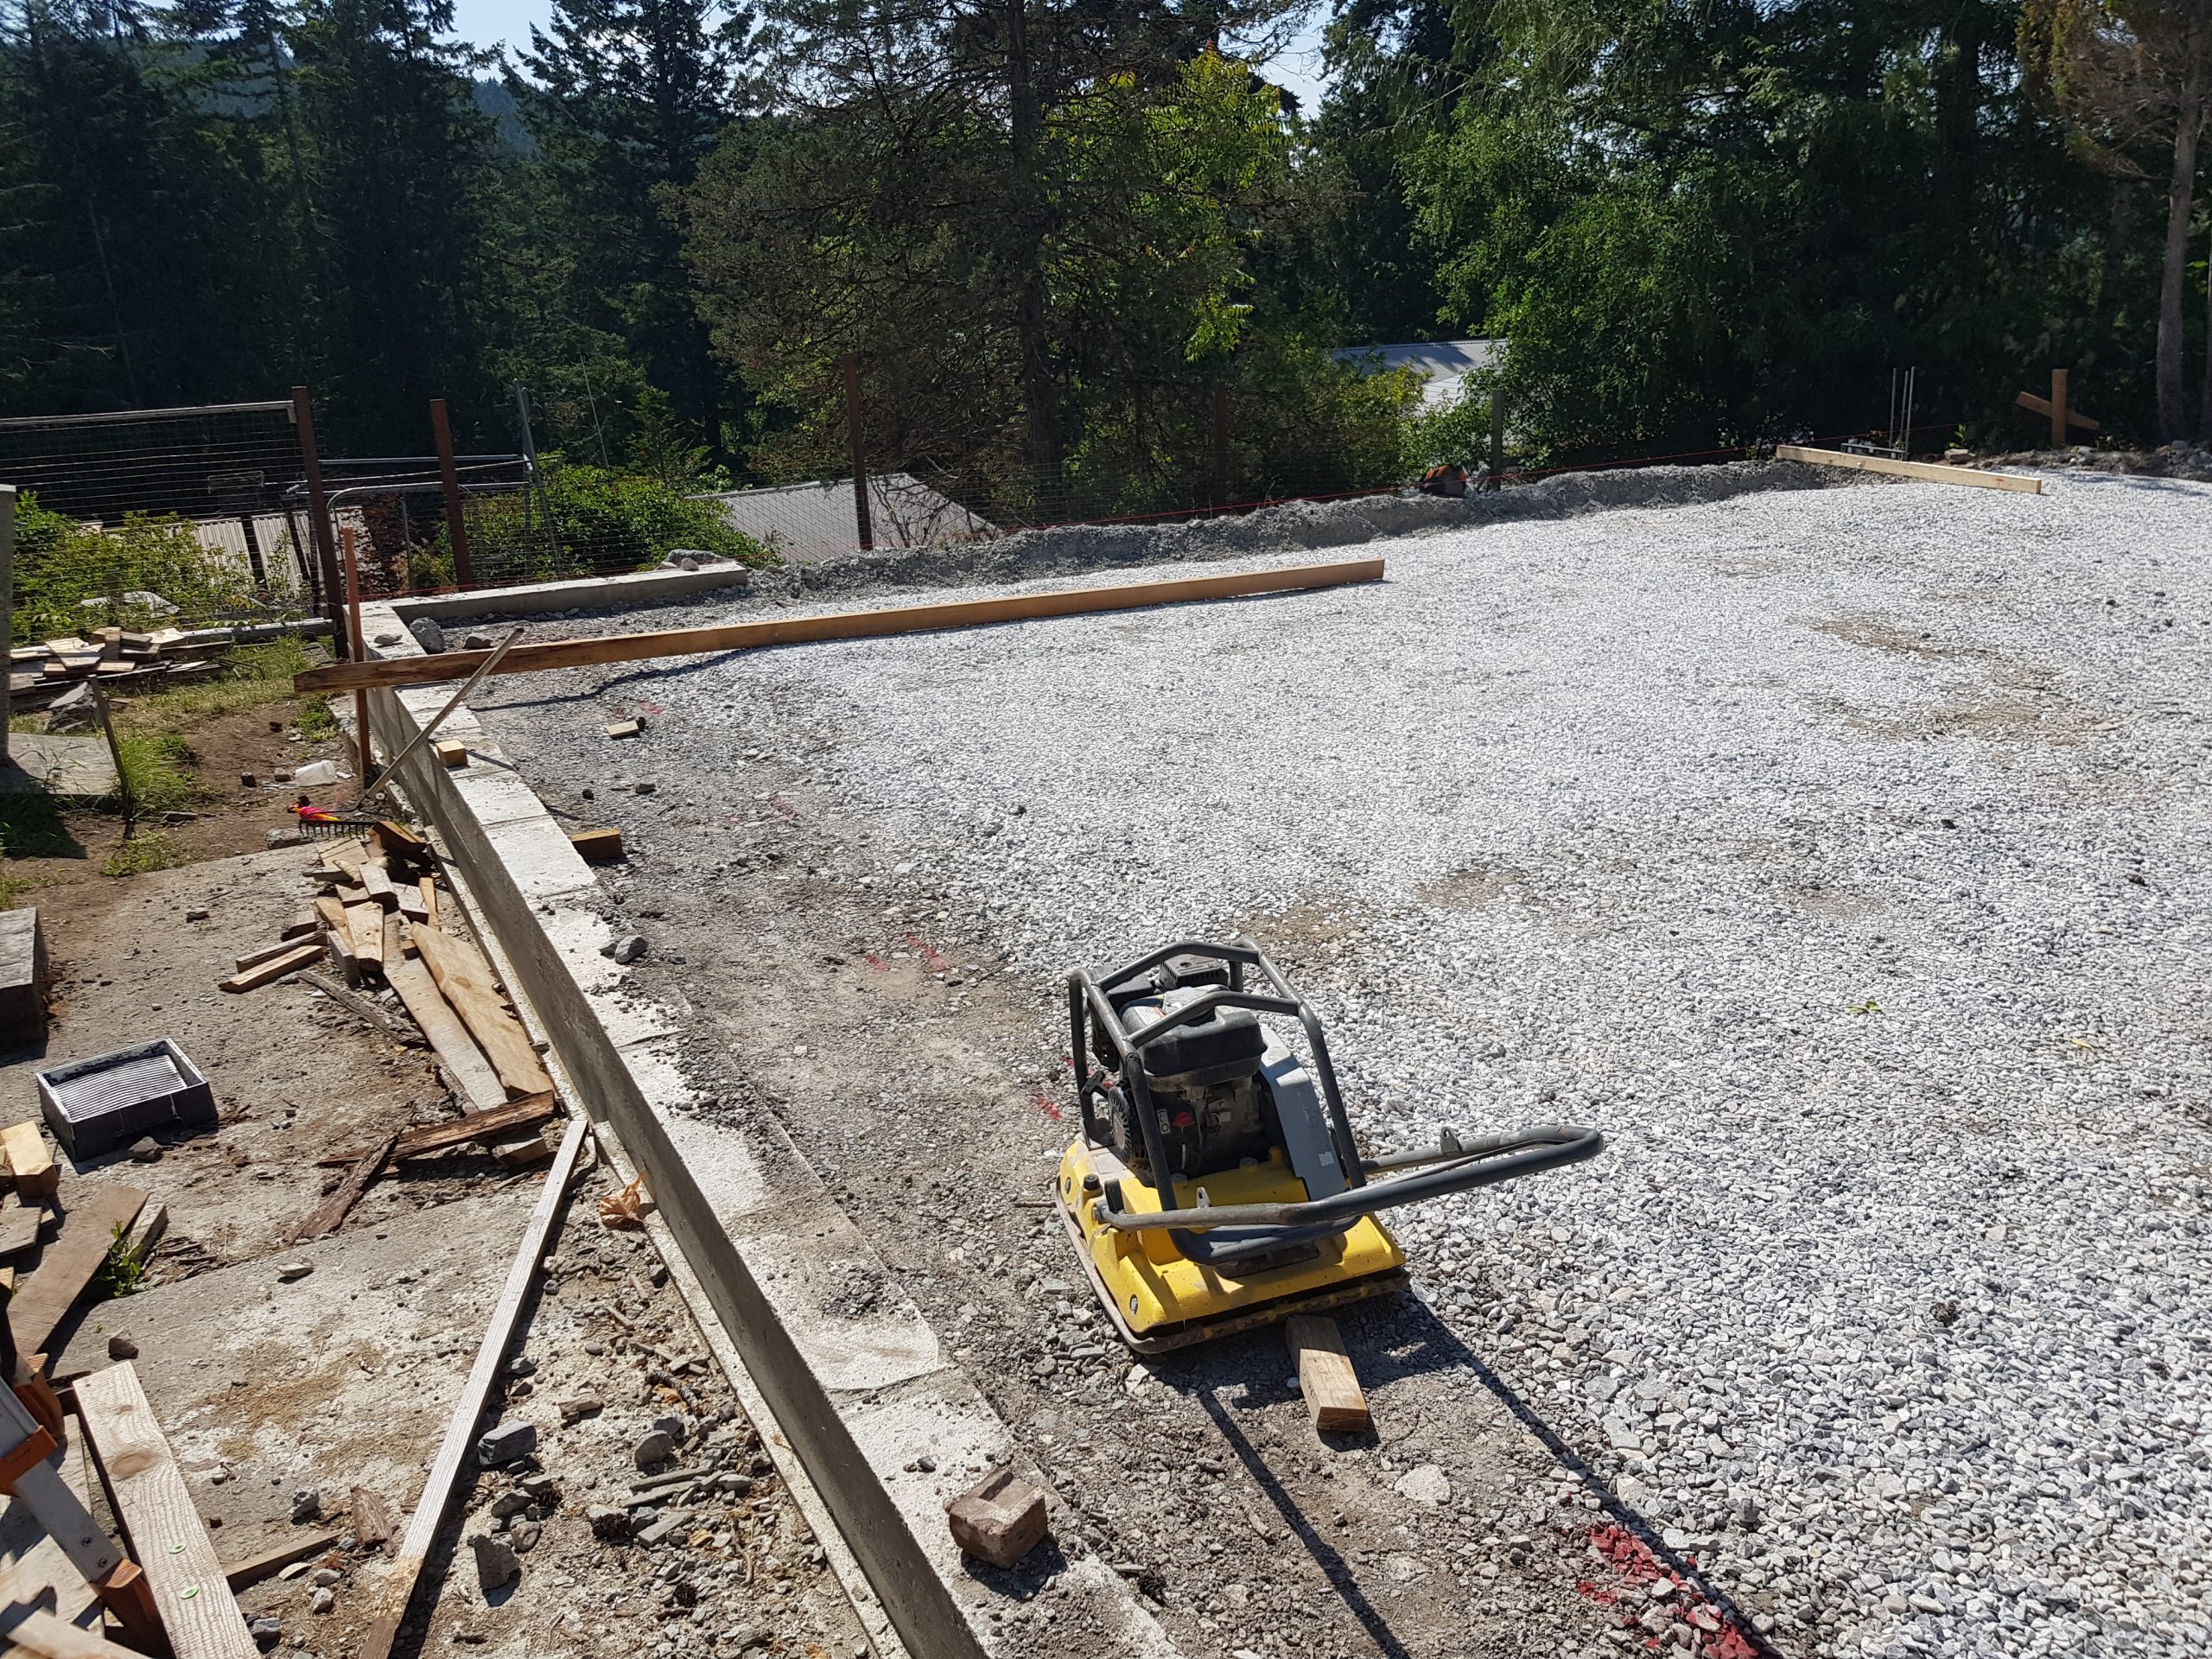
I began to rethink how important it was to bring the house up 3 feet. If I could just pour a slab and avoid building a subfloor altogether I might have enough lumber to build almost the entire house, save for the studs. This would require excavating the driveway side of the house down to a lower elevation and jackhammering away the rock we would inevitably hit. And yet, I would also leapfrog several stages into the construction process. We would be back on our loose schedule.
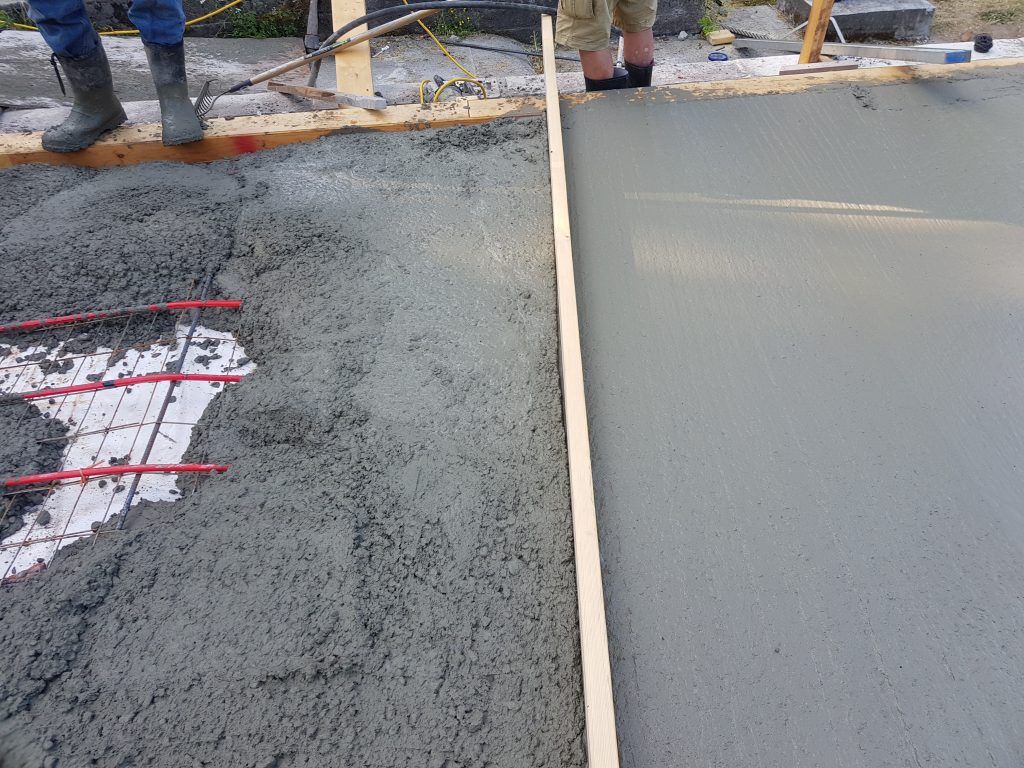
I went down the research rabbit-hole on slab foundations. The traditional stem wall slab, where the slab is poured independently within a walled perimeter, had multiple drawbacks. It required concrete trucks coming over on the ferry on two occasions, almost as much formwork as the crawlspace, and then having to fill, level, and pour a skim-coat slab inside it.
I wanted to build slab-on-grade and there were no guidelines in the building code for such a design. Our building code stipulates that the foundation must extend below the frostline, unless otherwise specified by an engineer. This is to prevent cracking and structural failure of the concrete as it expands and contracts during freeze and thaw cycles.
I could not find any information about insulation requirements for a slab-on-grade. I wanted some sort of documentation from a Canadian authority on what would constitute frost protection on top of the assurances of other builders. There were insulated forms and some other engineered systems on the market for the type of haunched slab I envisioned, but they were expensive and not locally available. Partially disillusioned about the viability of the idea, I carried on with other minor tasks, like fully fencing a half acre (I’ll write about that delightful experience another time).
Eventually, on one of my deep dives, I stumbled on a publication in the publication.gc.ca archive titled: Insulated Slab-on-Grade Foundations: A Design Guide for Rural, Northern and First Nations Housing. It outlines the use case of slab-on-grade and contains a design for almost exactly the foundation I had in mind, complete with the minimum insulation skirting requirements for frost protection by geographic region of Canada. With that and the mounting evidence we would be very short of lumber with the crawlspace design, we pivoted again.
This turned out to be an excellent decision, unlike so many flights-of-fancy. The formwork for the monolithic slab was much simpler and considerably cheaper, consisting mostly of material we would be able to reuse in framing.

Throughout the building experience, it has paid off to remain flexible, despite the accompanied uncertainty. Psychologically I think it is important to learn to adapt and rethink when you confront the myriad problems that arise when building a house. Sometimes just the sheer number of decisions you need to make daily can be overwhelming. For instance, once we decided on building on a slab, we felt we would regret it if we did not put in heated floors. Oh well, the slab already required sorting out all the plumbing before the the pour, so what’s another 1000ft of piping and learning how to install hydronic heating? I have learned in the last few years that work begets more work. But I don’t complain. I like heated floors.
Thanks for reading,
George
Building by Nature